
By Amri HTZ –
The issue of hose clamps that often loosen or come off during use causes endless irritation. It often occurs on hoses that are used to handle high pressures such as water or wind.
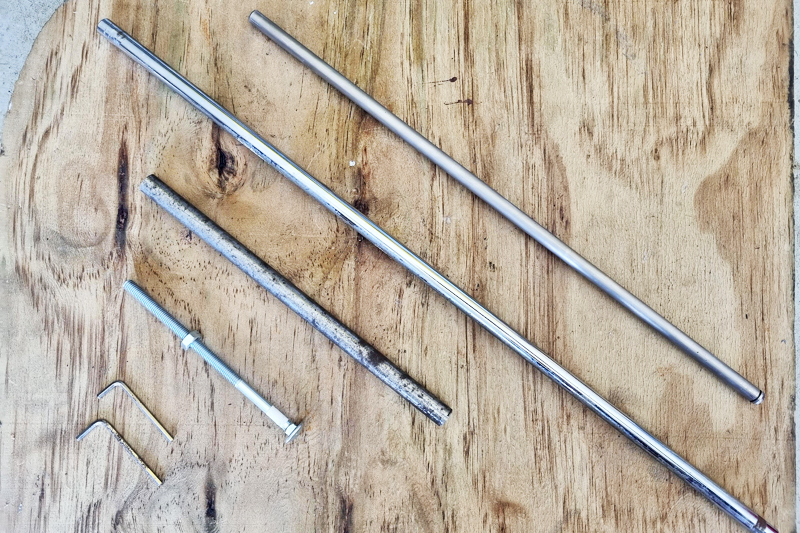
To solve the problem of such hose clamping, by only using a wire and a special tightening tool for it, such a problem can be solved easily. (Picture 1)
Some items are needed
• 12mm iron pipe
• 10mm and 13mm iron rods
• Coach bolt M8
• Iron bushings
• Iron rod or Allen wrench
• Angle grinder machine
• Drilling machine
• Center punch tool
• M8 taper
• Iron file
INITIAL PREPARATION BEFORE MANUFACTURING
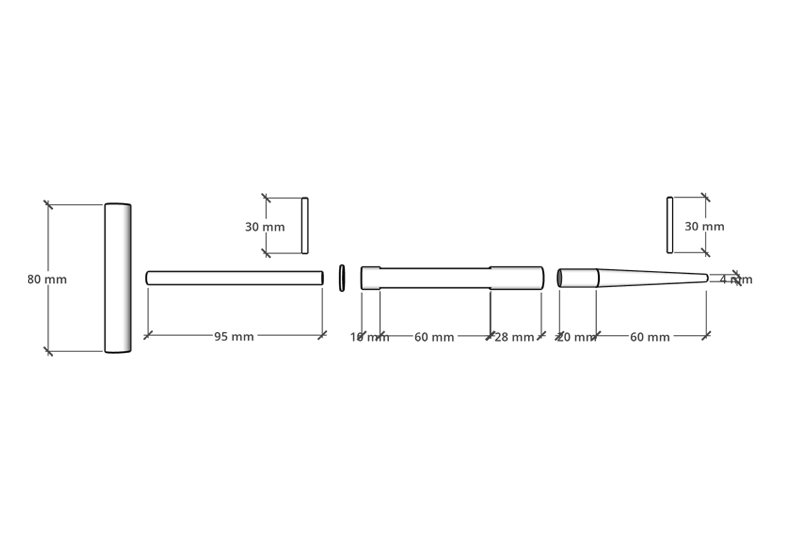
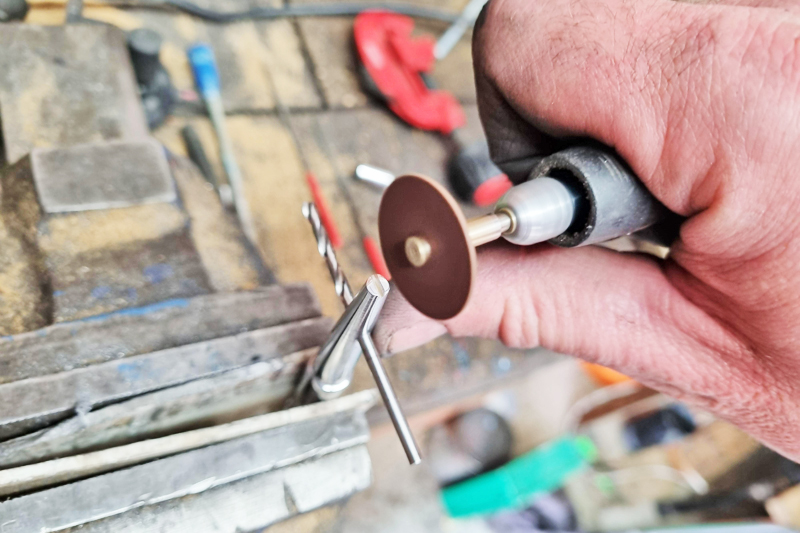
There are two sizes of iron rod that will be used on this project. 13mm iron will be used for the handle and 10mm for the pointed front. Meanwhile, a 12mm iron pipe with a 9.5mm diameter hole is for the tool body. A rod or Allen wrench will be formed and used for the pin where the wire is tied as a hose clamp. (Picture 2)
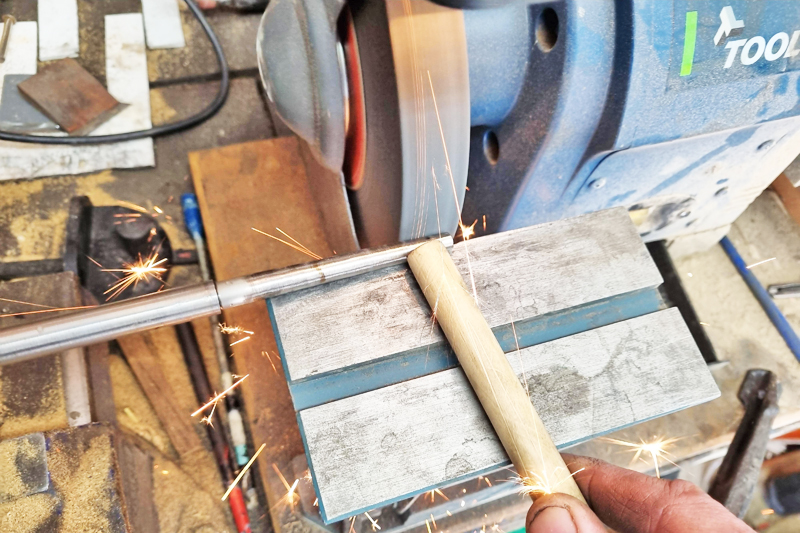
First, cut the rod for the handle with a length of 80mm. This is followed by a 60mm long iron body part of the tool. Use the machine angle grinder with the cut material set on the bench vise. (Picture 3)
To form the tapered end of the tool, make sure you don’t cut it to 80mm length first. This is to ensure that it is easy to hold during the shaping process.

Since it will be hot during the shaping process, use a stick to help you keep it in place. Only 60mm of the tip will be molded while the other 20mm is left to the original size to ensure it is tight when inserted into the body of the design. (Picture 4)
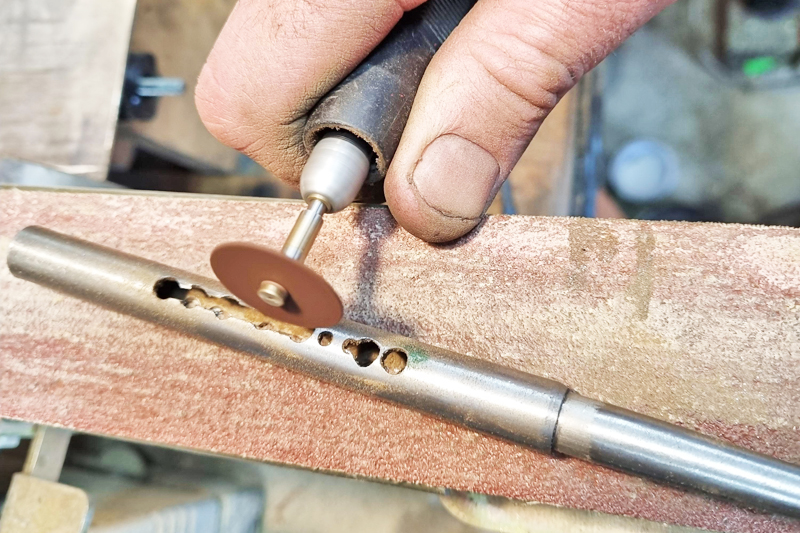
For the iron part of the body, the middle part will be punched to allow the pin to be inserted in addition to the special one coach bolt type M8 can move.
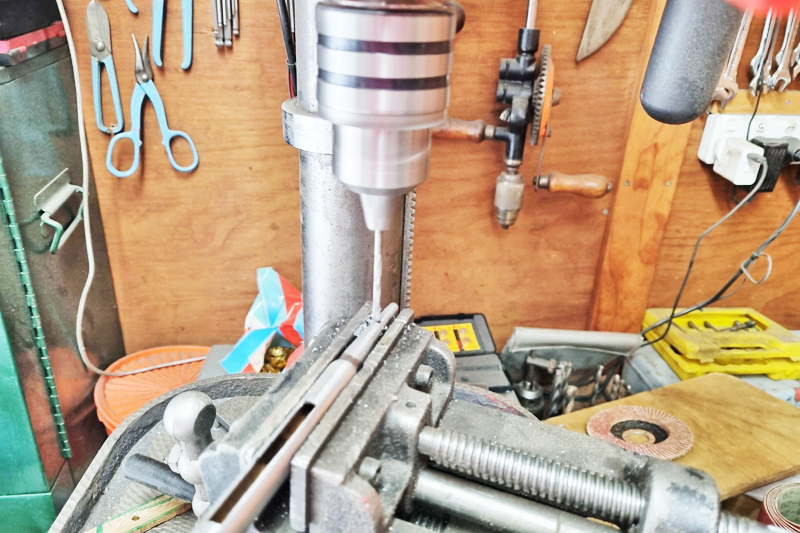
By setting a measurement of 28mm and 10mm from both ends, you can now drill and remove some of the metal in the middle using a Dremel machine. (Picture 5)
FOCUS ON THE PIN
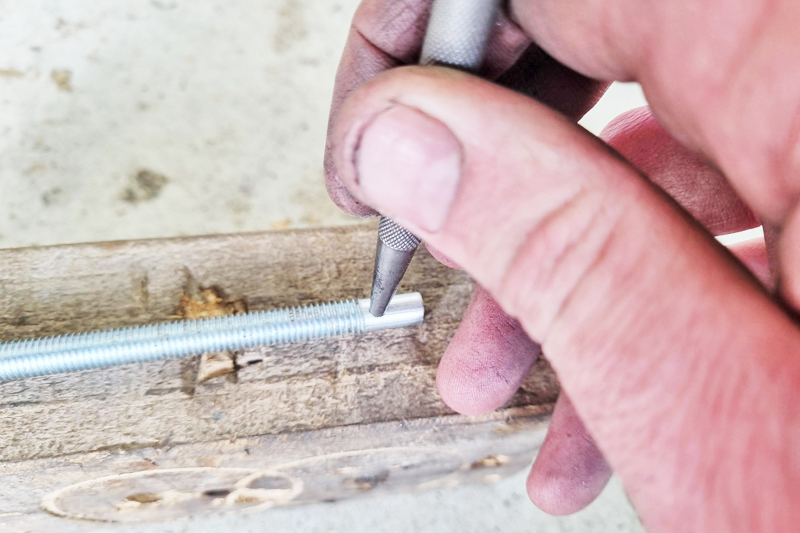
The pin to be set on coach bolt and the end of the tool requires you to drill it using a 4.8mm drill bit. Tool center punch will be used in this step as a position marker to make it easier for the drill bit to punch it. (Picture 6)
Use it vise suitable when punching material. This is important to ensure safety where when drilling, the risk of the drill bit moving from its position is high and can hit your hand. (Picture 7)
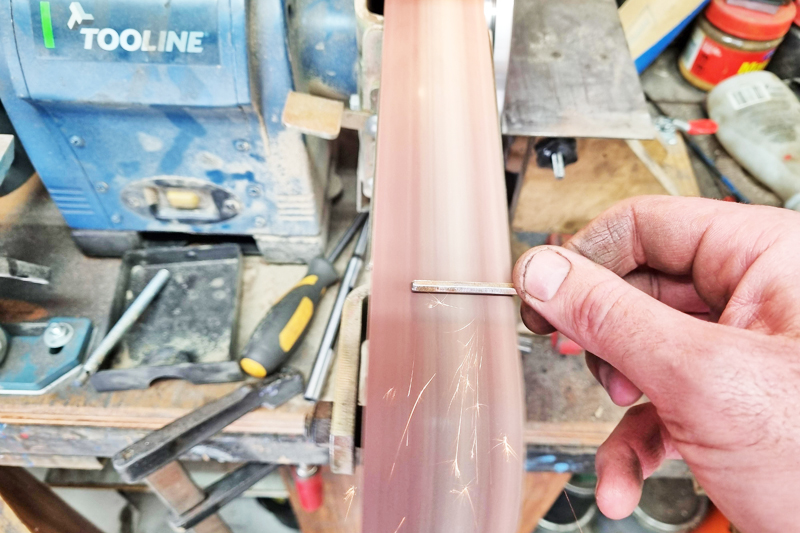
A pin made of iron rod or an Allen wrench will be formed with a diameter of 5mm required. Therefore, it requires you to rub its external surface using a machine angle grinder. Use a sandpaper type machine belt will speed up the manufacturing process. After that cut it to a length of 30mm for the pin on the body and the end of the wire tightening tool. (Picture 8)
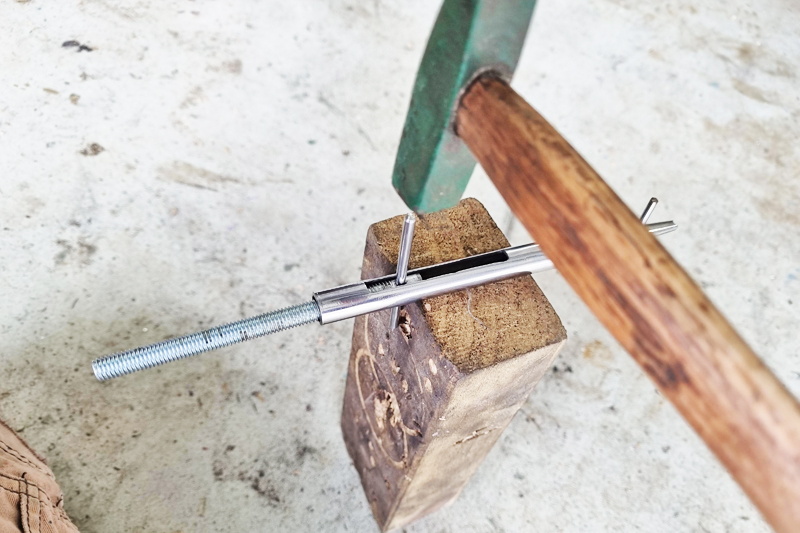
Having finished forming the pin, you can now insert it into the hole on the surface coach bolt. This step is done after the bolt is inserted into the design body. In addition, the end of the design can also be joined with the body of the design by knocking it in. (Picture 9)
GROOVE TO KEEP WIRE TIGHT
In order to ensure that the wire to be tightened on the hose later remains in position, the tapered end will be designed with a 2mm deep groove. Make sure the groove is parallel to the position of the inserted pin. (Picture 10)
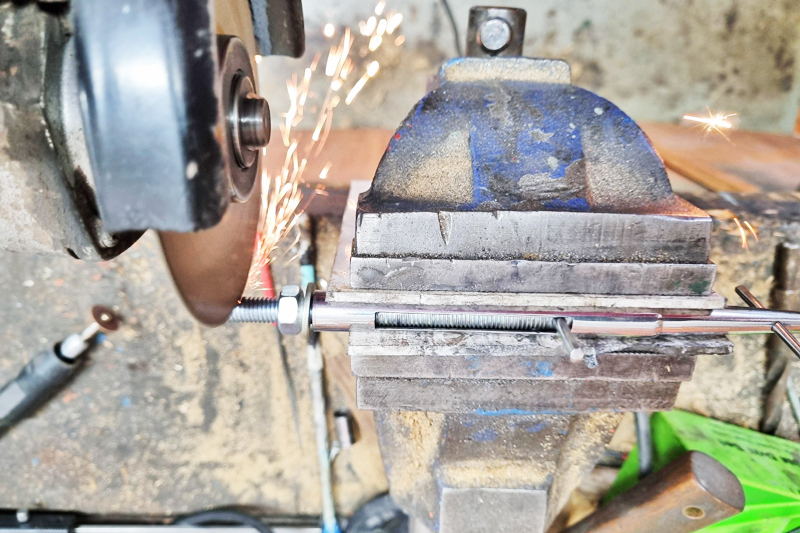
Coach bolts which is too long, then also cut to 95mm.
As in the previous step, set the material position of the cut on vise before starting the cutting step. (Picture 11)
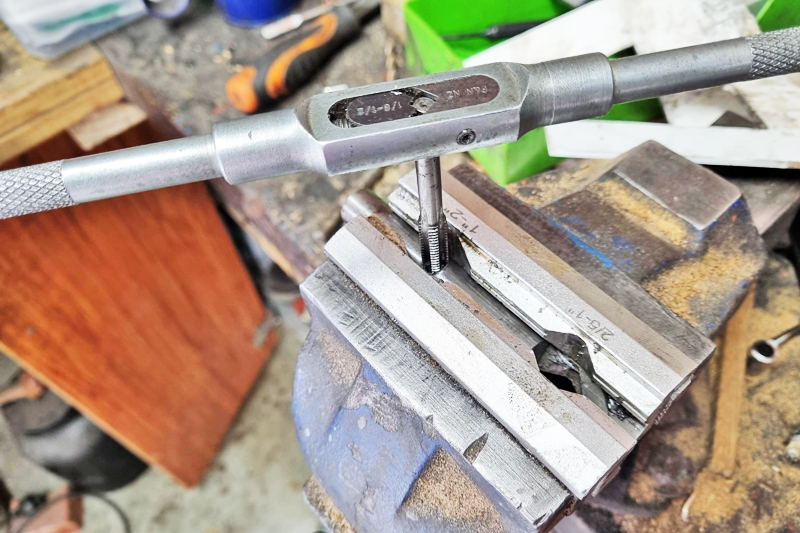
The final manufacturing step is to drill the center of the handle specifically for the hole coach bolt. After punching it, design the thread on the inside of the hole using a tool taper measuring M8 according to the thread on coach bolt
Before entering coach boltplace an iron bushing between the body and the design holder. With the creation of a wire tightening tool as a hose clamp, the commonly used hose cap tool will no longer be easily loose or detached. (Picture 12)
Design tip
• To re-polish the design surface, use white polishing wax with a cotton type polishing wheel.
• The material to be shaped is easier if it is long enough to allow you to hold it.